Give new life to an old chest with some paint and glaze – this painted cedar chest once was trash, but now is a valuable storage piece that looks beautiful as well! This post contains affiliate links- full disclosure here.
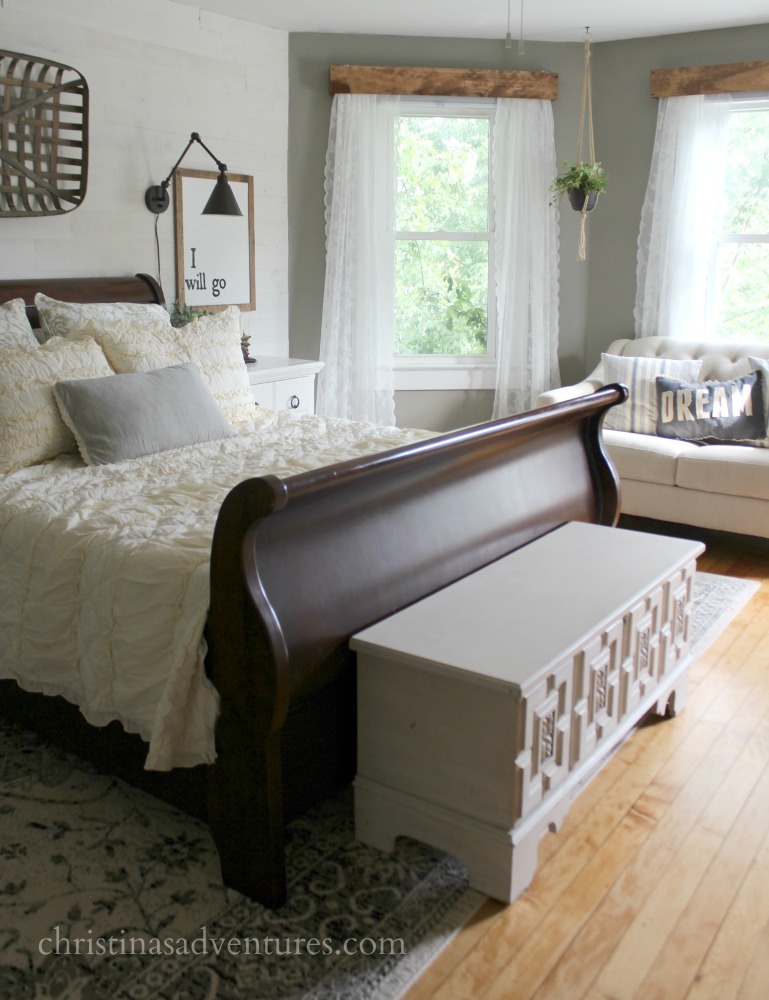
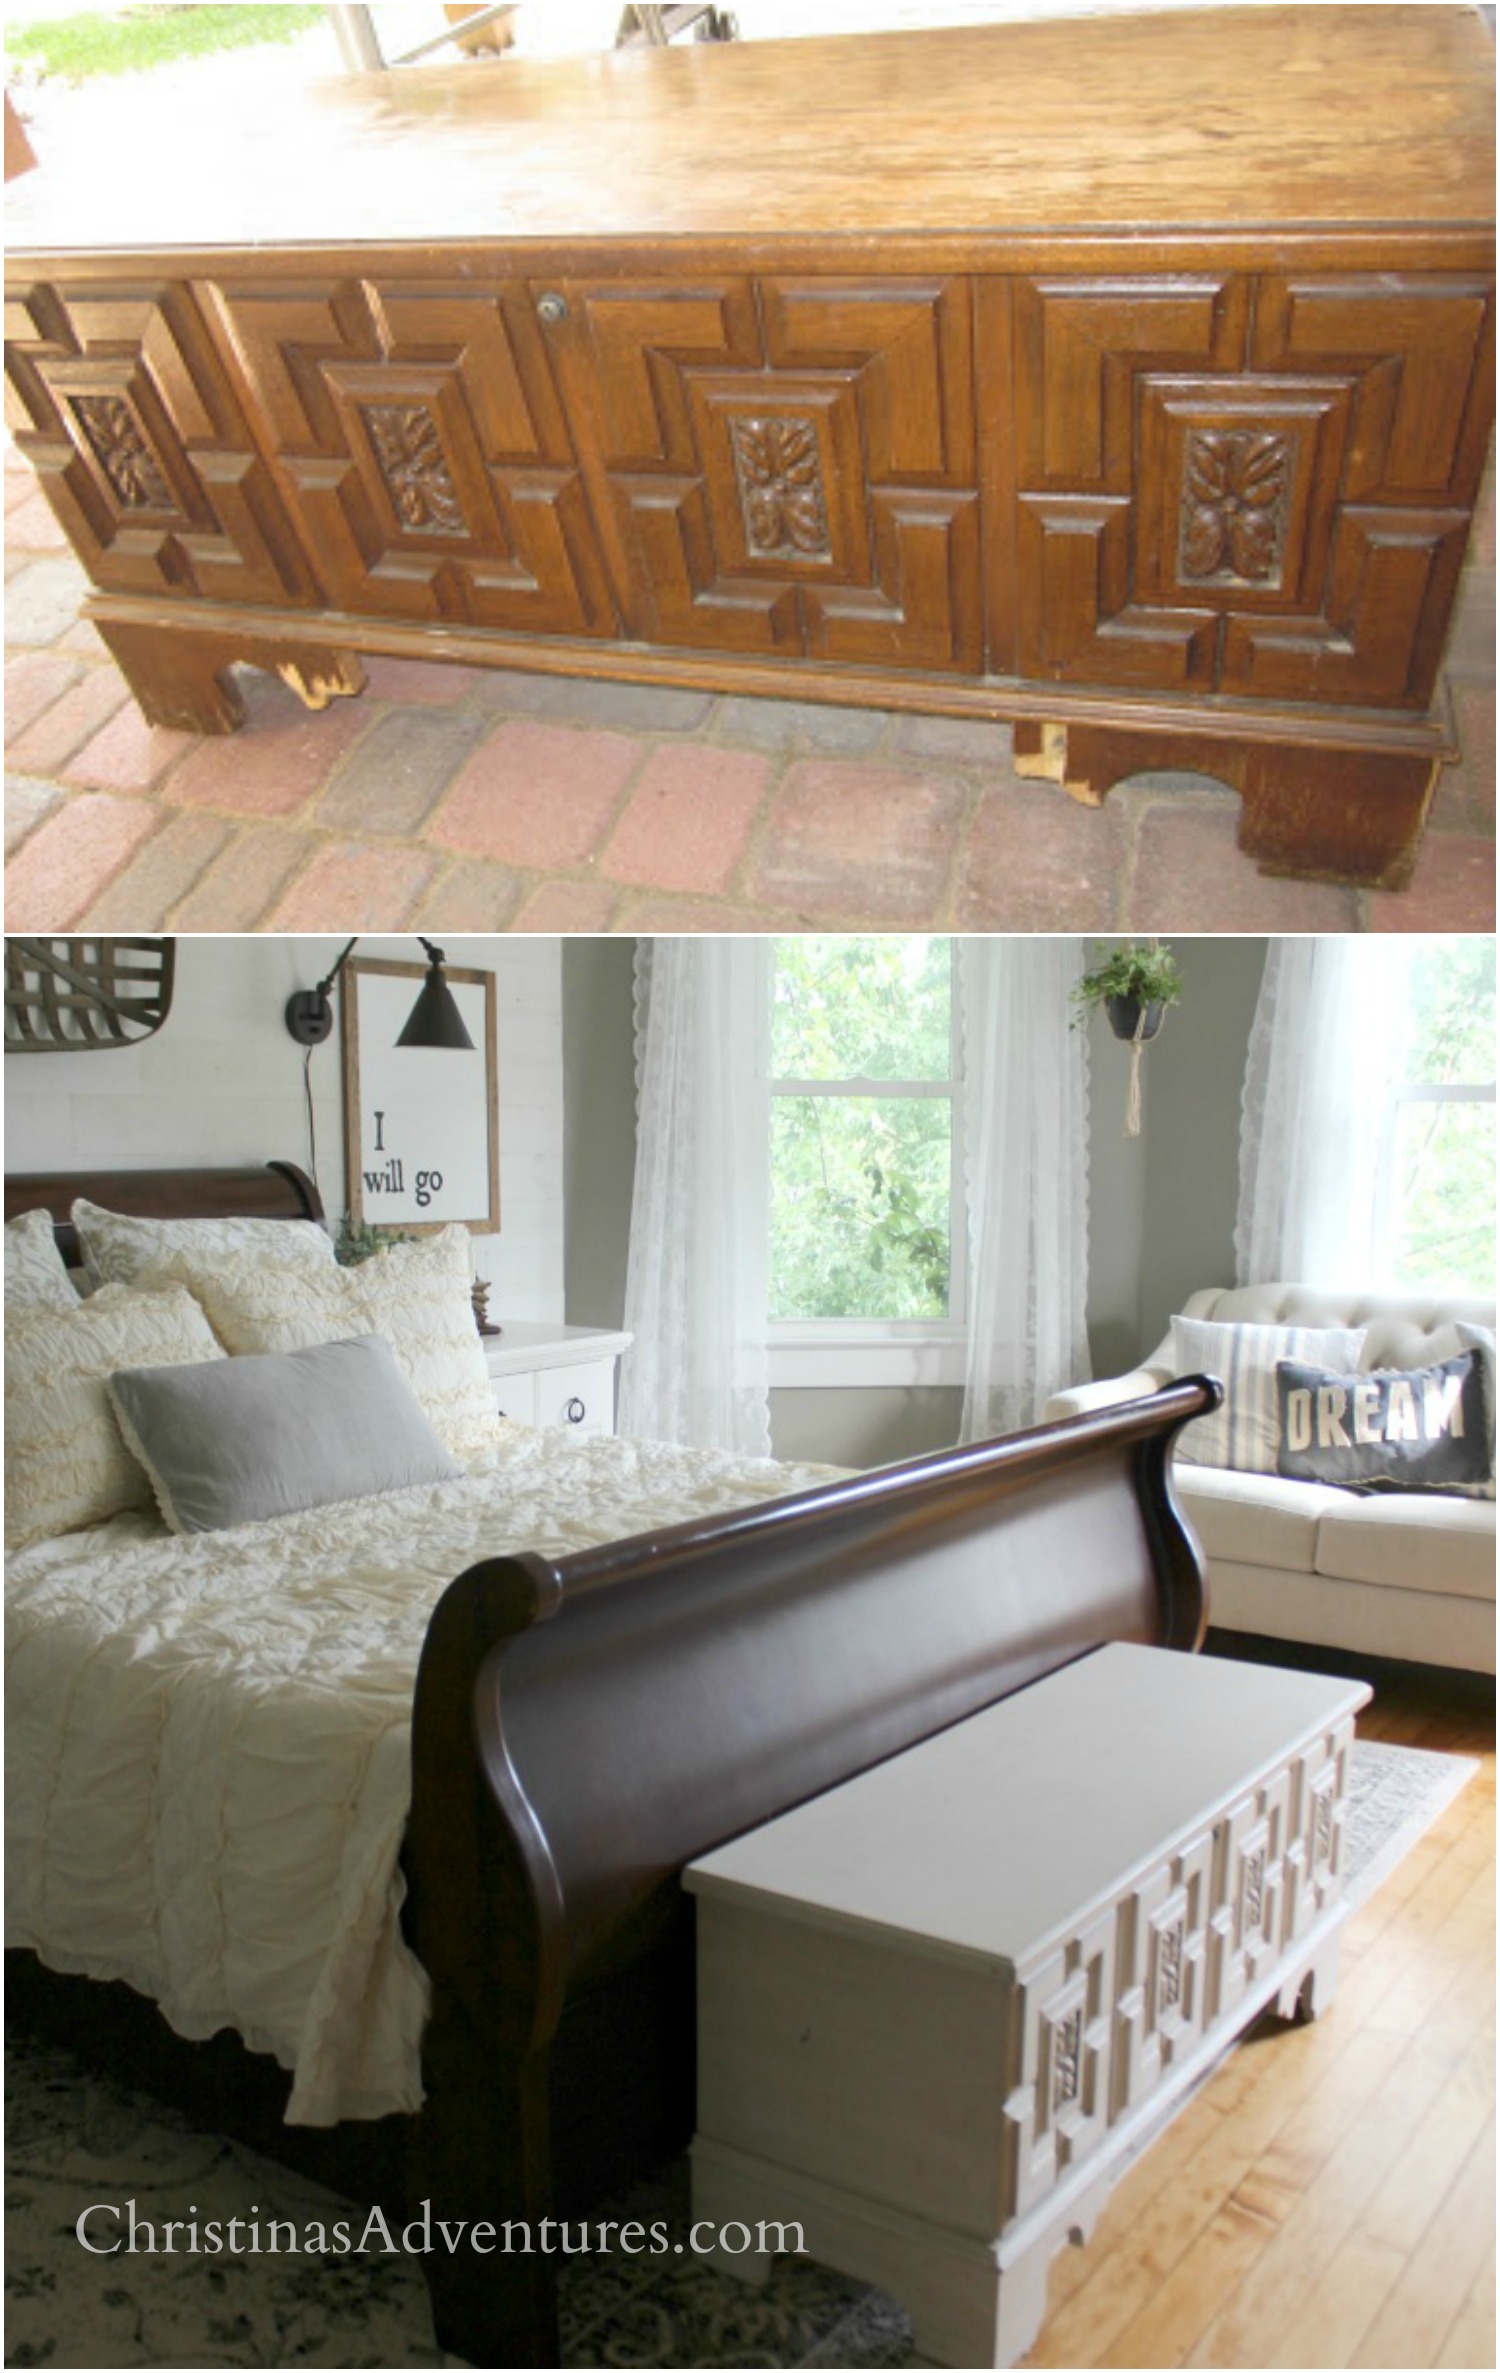
Updated to add: This makeover post is a few years old, but this piece of furniture has stood the test of time! We have moved it multiple times and still use it in our bedroom today. You can see more of it in our bedroom makeover here.
How to paint a cedar chest:
I have *drooled* over wooden chests for years, and have never found a nice, solid, chest that I could actually afford. Everyone on Craigslist sells ugly beat-up chests for over $100!
A few months ago, one of the secretaries in the school I work at contacted me. She let me know that she was getting rid of an old family chest because it was in really bad condition. She said it had been sitting in her basement for years, but she just pulled it to the curb the night before so they could be picked up by the garbage.
What?! No! I had to get over there right away!
I was so excited for this chest…after all, I had been dreaming about a chest like this for so long! So, I dreamed… for 8 months.
Yes, 8 months. I am ashamed.
I would like to think it’s because I really wanted it to turn out “perfectly”…and I didn’t have a clear vision for it yet.
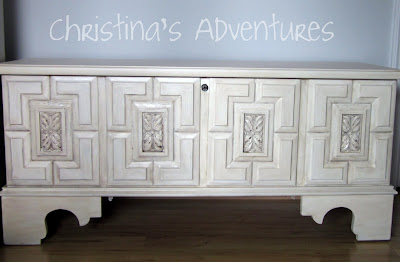
Well, I have finally finished this chest, and I am in love with it now!
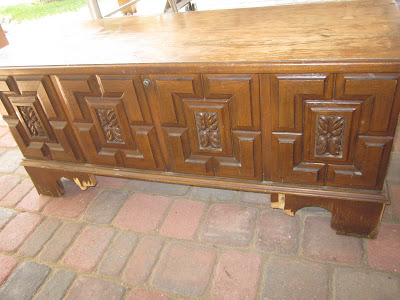
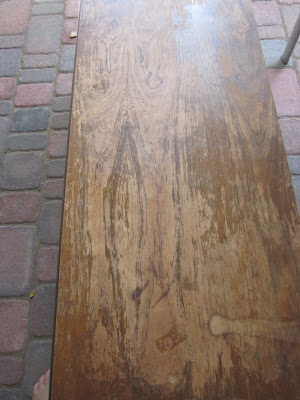
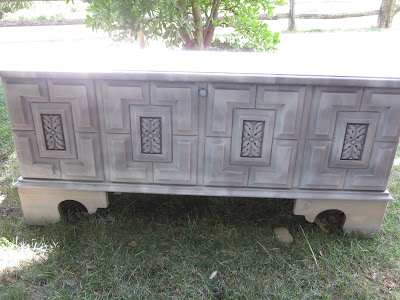
So, you want to see where this chest started? Here’s how it looked when I got it 8 months ago:
What you need to refinish a cedar chest:
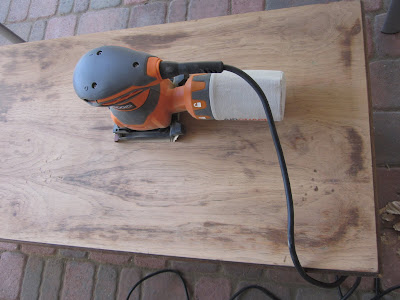
- Palm sander
- They don’t have to be expensive! Here’s a great affordable option
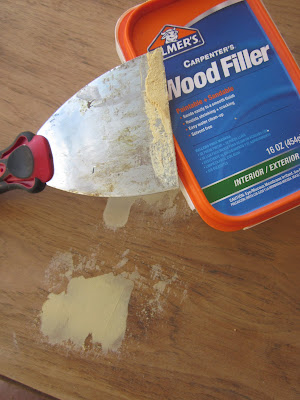
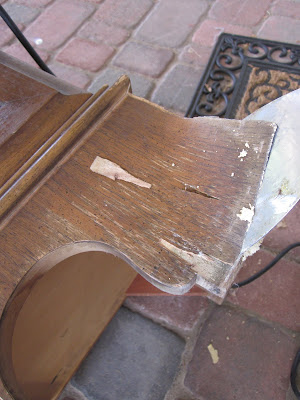
- Wood filler
- Primer (this is my absolute favorite)
- Paint
- small foam roller
- paint brush (I ONLY use this kind)
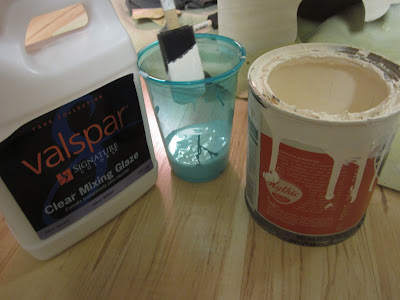
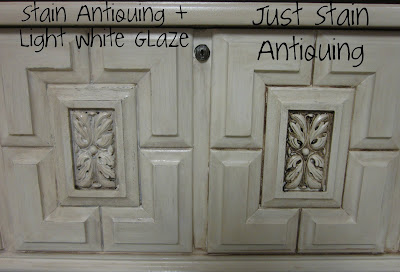
- optional: glaze or stain
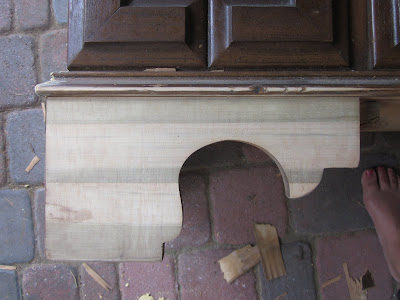
Beginning steps of prepping the cedar chest for painting:
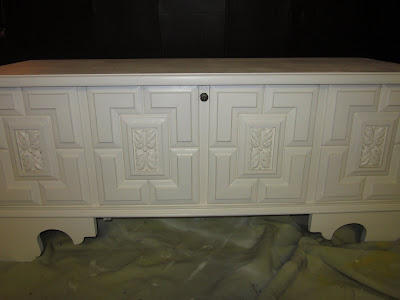
Painting and priming the chest:
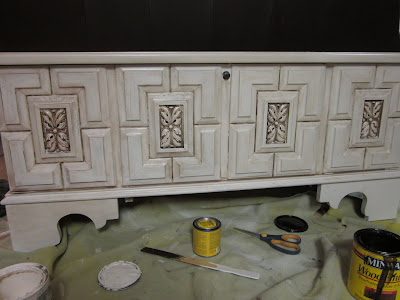
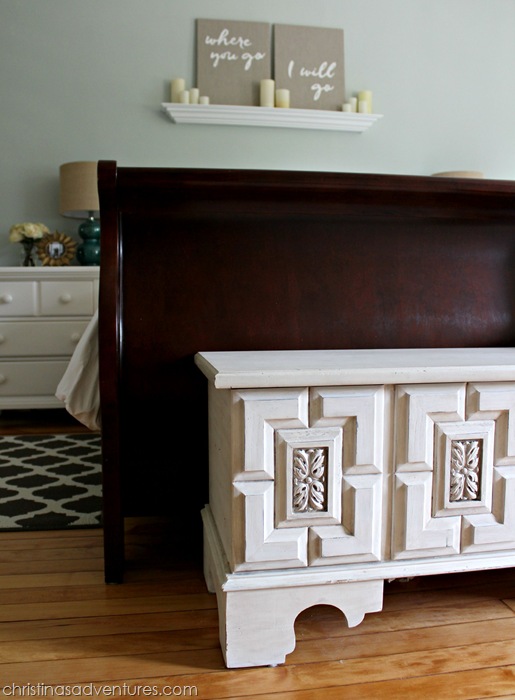
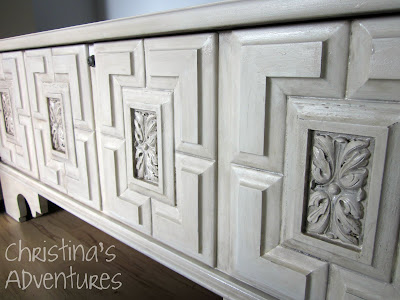
A finished painted cedar chest:


That is gorgeous! I can't believe someone would throw that away, you totally made it a keeper!!
Oh I love this!! It came out so beautiful – I love the details on the chest. You did a great job.
It looks great!!!
Wow, I love it! You did a great job. The details are are great on the chest.
I love it!! It was definitely worth the wait! 🙂
OMGOSH!!!! This is amazing!!! I absolutely love it, and your blog!!
xxoo
Classic & Bubbly
Goodness, that is beeeautiful!! You done good!
It looks fabulous Christina! Great job!
gorgeous christina!! i want it for myself!!!
looks great! can't wait to see where you put it!
What a beautiful chest!! You did such a great job on it! Wow!
Hey, I ♥-ed your Etsy shop…you have some lovely stuff!! We should talk about maybe doing a giveaway together! 🙂
::hugs::
~Miss Raquel
http://www.God-sDaughter.blogspot.com
PS: I 'liked' your FB page too 😉
So glad you came to the rescue. It's beautiful.
Very beautiful! I'm stopping by from House of Grace. =D
Amazing! You did a wonderful job! Thanks for including all of the pics… now I don't feel so intimidated to try this myself!
Oh my gorgeous! Great job 🙂
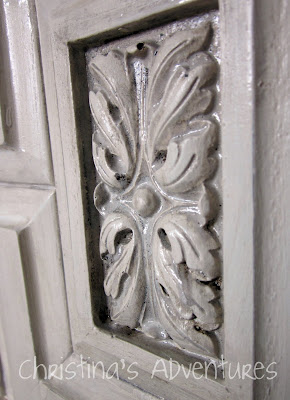
AMAZING!!! I love the detail in the center of each panel! The color turned out perfect! i love that it looks aged!! great job!!
Aw, so much love went into this chest, and the outcome was SO worth it! Amazing job! You will enjoy this for years to come!
By the way, I am hosting my very FIRST link party and I would love to have you link this to it–
http://southernlovely.blogspot.com/2011/08/show-share-1.html
Love, love, love this!!! Fantastic chest! Wonderful details!! Found you via Creations by Kara and am your newest follower. Pop on over for a visit if you get a moment. Tootles, Kathryn
http://thededicatedhouse.blogspot.com/2011/07/kitchen-cabinet-transformation.html
Holy smokes, this looks awesome! And for FREE! Where does the chest live now?
This really turned out well.
Beautiful. Great job.
That chest is amazing and you did such an awesome job transforming it!
very pretty 😀
Gorgeous! I am always so amazed how paint just changes everything! Love it!
Jo-Anna
WOw! I'm so impressed! It looks amazing!
You did an amazing job! It's beautiful, thanks for sharing!
http://www.modernwivelyhood.blogspot.com
Wow the details on that are awesome!
This is beautiful! Good thing your mom could rush over in the SUV! Could you imagine this gorgeous piece in the trash!? Glad you saved it!
Here from Serenity Now.
Oh I love the detail on this! I just got a lane cedar chest from our neighbor across the street a couple weeks ago. The top was upholstered in some nasty torn leather so I've reupholstered that and I'm going to get some chalk pain this weekend to finish the rest! I can't wait! Mine doesn't have this much detail on it but like you I have been dreaming of having one for forever! I would love to have you share this at my VIP party today… http://designergarden.blogspot.com/2011/08/vip-party-24.html
What I want to know is what the original owner thought of your makeover?
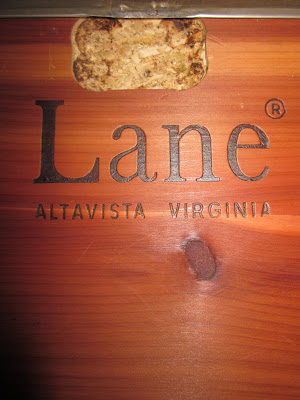
Just a FYI, there is a recall on Lane cedar chests concerning the locking mechanism. It seems that the older ones close and lock automatically causing a safety issue. You can email Lane for a replacement lock for free which includes a new key. I updated my 1974 cedar chest with the new lock–it's an easy fix.
Christina, this turned out absolutely gorgeous!! I just saw you on TT&J!!
*** It's FABULOUS, my friend, and you managed to get it EXACTLY as you'd DREAMED, just cuz you "put on your thinkin' cap" (!), as my precious Grama would say!!!……..It was WORTH it all, wasn't it? I sure think so!!!
Most sincere "congrats"! So glad you shared this, and I do enjoy/enjoyed your writing style!!!
Best,
Linda in AZ *
[email protected]
Who in their right mind would throw that away!! It's beautiful great job. And I love how the details pop really makes a statement.
http://designpardeux.com
I just saw you on C.R.A.F.T. What an amazing makeover! Wonderful job!! The glaze was a great idea & makes such a difference! 🙂 xo, Reannah
coming over from C.R.A.F.T. too and wow! this is fantastic…amazing what treasures people have unused in their basement huh?
you did a GREAT job even if it did take awhile! 😉
You did a really great job! Amazing what you can do to an old piece of furniture. Thanks for sharing!
I'm following your blog now 🙂
Wow!! I have an old cedar chest that needs to be refinished. Now I know what I want to do! Gorgeous!!
I found you on C.R.A.F.T., and I just LOVE what you did. My hubby has a rule that I am not allowed to paint anything wood. I hope he will change his mind when I show him this!
By the way, I am hosting a giveaway right now & would love to have you check it out!
http://sunla-designs.blogspot.com/search/label/Giveaways
Lisa!
Your newest follower!
so, so pretty. love the detail and how you made this piece current again!
Beautiful rescue, Christina! I love the new antique look! 🙂